
This article contains 10 visual tutorials intended for web designers and newbies on how to apply Javascript effects with jQuery. In case you don't know about jQuery, it is a "write less, do more" Javascript library. It has many Ajax and Javascript features that allow you to enhance user experience and semantic coding. Since these tutorials are focused on jQuery, I'm not going to get into the details of the CSS.
Note: the version used in this article is jQuery 1.2.3How jQuery works?
First you need to download a copy of jQuery and insert it in your html page (preferably within the<head> tag). Then you need to write functions to tell jQuery what to do. The diagram below explains the detail how jQuery work:
How to get the element?
Writing jQuery function is relatively easy (thanks to the wonderful documentation). The key point you have to learn is how to get the exact element that you want to apply the effects.$("#header")= get the element with id="header"$("h3")= get all <h3> element$("div#content .photo")= get all element with class="photo" nested in the <div id="content">$("ul li")= get all <li> element nested in all <ul>$("ul li:first")= get only the first <li> element of the <ul>
1. Simple slide panel
Let's start by doing a simple slide panel. You've probably seen a lot of this, where you click on a link and a panel slide up/down.
$(document).ready(function(){

 $(".btn-slide").click(function(){
   $("#panel").slideToggle("slow");
   $(this).toggleClass("active");
 });

});
2. Simple disappearing effect
This sample will show you how to make something disappear when an image button is clicked.
$(document).ready(function(){

 $(".pane .delete").click(function(){
   $(this).parents(".pane").animate({ opacity: "hide" }, "slow");
 });

});
3 Chain-able transition effects
Now let's see the power of jQuery's chainability. With just several lines of code, I can make the box fly around with scaling and fading transition.
Line 2: animate the <div id="box"> opacity=0.1, left property until it reaches 400px, with speed 1200 (milliseconds)
Line 3: then opacity=0.4, top=160px, height=20, width=20, with speed "slow"
Line 4: then opacity=1, left=0, height=100, width=100, with speed "slow"
Line 5: then opacity=1, left=0, height=100, width=100, with speed "slow"
Line 6: then top=0, with speed "fast"
Line 7: then slideUp (default speed = "normal")
Line 8: then slideDown, with speed "slow"
Line 9: return false will prevent the browser jump to the link anchor
$(document).ready(function(){

 $(".run").click(function(){

   $("#box").animate({opacity: "0.1", left: "+=400"}, 1200)
   .animate({opacity: "0.4", top: "+=160", height: "20", width: "20"}, "slow")
   .animate({opacity: "1", left: "0", height: "100", width: "100"}, "slow")
   .animate({top: "0"}, "fast")
   .slideUp()
   .slideDown("slow")
   return false;

 });

});
4a. Accordion #1
Here is a sample of accordion.
When the <h3> element is clicked, it will slideToggle the next <p> and slideUp all its siblings, then toggle the class="active".
$(document).ready(function(){

 $(".accordion h3:first").addClass("active");
 $(".accordion p:not(:first)").hide();


 $(".accordion h3").click(function(){

   $(this).next("p").slideToggle("slow")
   .siblings("p:visible").slideUp("slow");
   $(this).toggleClass("active");
   $(this).siblings("h3").removeClass("active");

 });

});
4b. Accordion #2
This example is very similar to accordion#1, but it will let you specify which panel to open as default.In the CSS stylesheet, set
.accordion p to display:none. Now suppose you want to open the third panel as default. You can write as $(".accordion2 p").eq(2).show(); (eq = equal). Note that the indexing starts at zero.$(document).ready(function(){
$(".accordion2 h3").eq(2).addClass("active");
$(".accordion2 p").eq(2).show();
$(".accordion2 h3").click(function(){
$(this).next("p").slideToggle("slow")
.siblings("p:visible").slideUp("slow");
$(this).toggleClass("active");
$(this).siblings("h3").removeClass("active");
});
});5a. Animated hover effect #1
This example will create a nice animated hover effect with fade in/out.
$(document).ready(function(){

 $(".menu a").hover(function() {
   $(this).next("em").animate({opacity: "show", top: "-75"}, "slow");
 }, function() {
   $(this).next("em").animate({opacity: "hide", top: "-85"}, "fast");
 });

});
5b. Animated hover effect #2
This example will get the menu linktitle attribute, store it in a variable, and then append to the <em> tag. 
<em> to the menu <a> element.When the link is mouseovered, it will get the
title attribute, store it in a variable "hoverText", and then set the <em> text content with the hoverText's value.$(document).ready(function(){
$(".menu2 a").append("<em></em>");
$(".menu2 a").hover(function() {
$(this).find("em").animate({opacity: "show", top: "-75"}, "slow");
var hoverText = $(this).attr("title");
$(this).find("em").text(hoverText);
}, function() {
$(this).find("em").animate({opacity: "hide", top: "-85"}, "fast");
});
});6. Entire block clickable
This example will show you how to make the entire block element clickable as seen on my Best Web Gallery's sidebar tabs.
<ul> list with class="pane-list" and you want to make the nested <li> clickable (entire block). You can assign the click function to ".pane-list li"; and when it is clicked, the function will find the <a> element and redirect the browser location to its href attribute value.$(document).ready(function(){
$(".pane-list li").click(function(){
window.location=$(this).find("a").attr("href"); return false;
});
});7. Collapsible panels
Let's combine the techniques from the previous examples and create a serie of collapsible panels (similar to the Gmail inbox panels). Notice I also used the same technique on Web Designer Wall comment list and Next2Friends message inbox?
Second line: hide all <li> element after the 5th
Third part: when the <p class="message_head"> is clicked, slideToggle the next <div class="message_body">
Fourth part: when the <a class="collpase_all_message"> button is clicked, slideUp all <div class="message_body">
Fifth part: when the <a class="show_all_message"> is clicked, hide this, show <a class="show_recent_only">, and slideDown all <li> after the fifth one.
Sixth part: when the <a class="show_recent_only"> is clicked, hide this, show <a class="show_all_message">, and slideUp all <li> after the 5th.
$(document).ready(function(){

 //hide message_body after the first one
 $(".message_list .message_body:gt(0)").hide();

 //hide message li after the 5th
 $(".message_list li:gt(4)").hide();


 //toggle message_body
 $(".message_head").click(function(){
   $(this).next(".message_body").slideToggle(500)
   return false;
 });

 //collapse all messages
 $(".collpase_all_message").click(function(){
   $(".message_body").slideUp(500)
   return false;
 });

 //show all messages
 $(".show_all_message").click(function(){
   $(this).hide()
   $(".show_recent_only").show()
   $(".message_list li:gt(4)").slideDown()
   return false;
 });

 //show recent messages only
 $(".show_recent_only").click(function(){
   $(this).hide()
   $(".show_all_message").show()
   $(".message_list li:gt(4)").slideUp()
   return false;
 });

});
8. Imitating the WordPress Comment Backend
I think most of you have probably seen the WordPress Ajax comment management backend. Well, let's imitate it with jQuery. In order to animate the background color, you need include the Color Animations plugin.
Second part: when <a class="btn-delete"> is clicked, alert a message, and then animate the backgroundColor and opacity of <div class="pane">
Third part: when <a class="btn-unapprove"> is clicked, first animate the backgroundColor of <div class="pane"> to yellow, then white, and addClass "spam"
Fourth part: when <a class="btn-approve"> is clicked, first animate the backgroundColor of <div class="pane"> to green, then white, and removeClass "spam"
Fifth part: when <a class="btn-spam"> is clicked, animate the backgroundColor to red and opacity ="hide"
//don't forget to include the Color Animations plugin
//<script type="text/javascript" src="jquery.color.js"></script>

$(document).ready(function(){

 $(".pane:even").addClass("alt");

 $(".pane .btn-delete").click(function(){
   alert("This comment will be deleted!");

   $(this).parents(".pane").animate({ backgroundColor: "#fbc7c7" }, "fast")
   .animate({ opacity: "hide" }, "slow")
   return false;
 });

 $(".pane .btn-unapprove").click(function(){
   $(this).parents(".pane").animate({ backgroundColor: "#fff568" }, "fast")
   .animate({ backgroundColor: "#ffffff" }, "slow")
   .addClass("spam")
   return false;
 });

 $(".pane .btn-approve").click(function(){
   $(this).parents(".pane").animate({ backgroundColor: "#dafda5" }, "fast")
   .animate({ backgroundColor: "#ffffff" }, "slow")
   .removeClass("spam")
   return false;
 });

 $(".pane .btn-spam").click(function(){
   $(this).parents(".pane").animate({ backgroundColor: "#fbc7c7" }, "fast")
   .animate({ opacity: "hide" }, "slow")
   return false;
 });

});
9. Image replacement gallery
Suppose you have a portfolio where you want to showcase multi images without jumping to another page, you can load the JPG into the target element.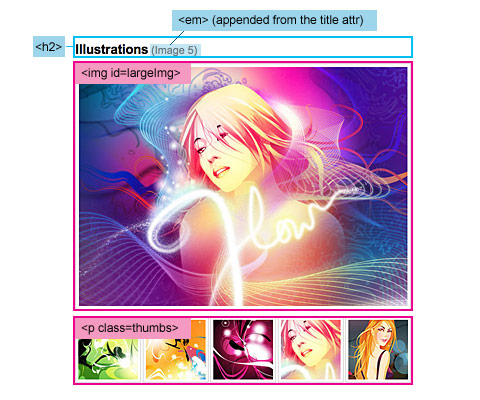
When a link within the <p class=thumbs> is clicked:
- store its
href attribute into a variable "largePath"- store its
title attribute into a variable "largeAlt"- replace the <img id="largeImg">
scr attribute with the variable "largePath" and replace the alt attribute with the variable "largeAlt"- Set the
em content (within the h2) with the variable largeAlt (plus the brackets)$(document).ready(function(){
$("h2").append('<em></em>')
$(".thumbs a").click(function(){
var largePath = $(this).attr("href");
var largeAlt = $(this).attr("title");
$("#largeImg").attr({ src: largePath, alt: largeAlt });
$("h2 em").html(" (" + largeAlt + ")"); return false;
});
});10. Styling different link types
With most modern browsers, styling the link selector is very easy. For example, to style the link to .pdf file, you can simply use the following CSS rule:a[href $='.pdf'] { ... }. Unfortunately, IE 6 doesn't support this (this is another reason why we hate IE!). To get around this, you can do it with jQuery. 
<a> element according to their href attribute.The second part will get all
<a> element that does not have "http://www.webdesignerwall.com" and/or does not start with "#" in the href attribute, then addClass "external" and set target= "_blank".$(document).ready(function(){
$("a[@href$=pdf]").addClass("pdf");
$("a[@href$=zip]").addClass("zip");
$("a[@href$=psd]").addClass("psd");
$("a:not([@href*=http://www.webdesignerwall.com])").not("[href^=#]")
.addClass("external")
.attr({ target: "_blank" });
}); Labels:
Javascript
Labels:
Javascript
 Previous Article


Responses
0 Respones to "jQuery Tutorials for Designers"
Post a Comment